Sensor on-boarding
Sensor Commissioning From Blank Hardware to Production Firmware
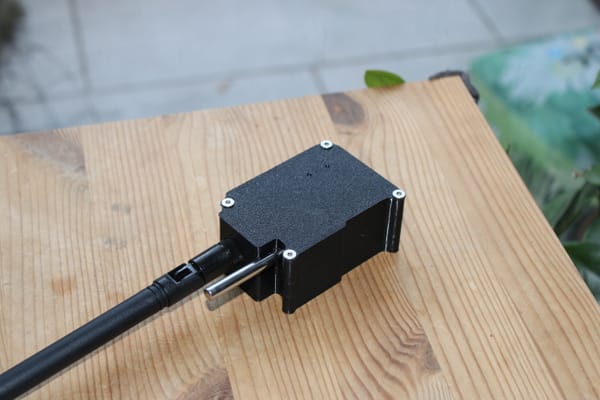
Hardware
| Component | Detail |
|---|---|
| MCU | Adafruit ItsyBitsy nRF52840 |
| Factory bootloader | Adafruit UF2 bootloader (ships on every ItsyBitsy) |
| Target bootloader | MCUboot (Nordic sysbuild, installed by flasher app) |
| Sensor | DS18B20 temperature (1-Wire, P0.08) + battery ADC (P0.29) |
| USB | Native USB CDC-ACM firmware update transport |
| BLE | Nordic SoftDevice Controller, static random address |
Flash Partition Layout
After the flasher app runs, the 1 MB nRF52840 flash is laid out as:
| Region | Address range | Size | Content |
|---|---|---|---|
| MCUboot | 0x000000 – 0x018000 |
96 KB | Secure bootloader |
| slot0 (image-0) | 0x018000 – 0x08A000 |
456 KB | Running application |
| slot1 (image-1) | 0x08A000 – 0x0FC000 |
456 KB | DFU staging area |
| NVS / Settings | 0x0FC000 – 0x100000 |
16 KB | BLE name, config |
MCUboot manages slot0 and slot1. It always runs the image in slot0. A DFU
update is uploaded to slot1, then MCUboot swaps the two slots on the next
boot.
Prerequisites
All tools must be installed once per development machine.
nRF Connect SDK v2.8.0
ls ~/ncs/v2.8.0/zephyr   # must exist
west --version
mcumgr CLI
Used for all firmware updates after MCUboot is installed. Install once:
go install [github.com/apache/mynewt-mcumgr-cli/mcumgr@latest](https://github.com/apache/mynewt-mcumgr-cli/mcumgr@latest)
echo 'export PATH="$HOME/go/bin:$PATH"' >> ~/.zshrc && source ~/.zshrc
mcumgr version
Python 3
Required for the UF2 conversion script (hex_to_uf2.py) used by
flasher/flash.sh. No additional packages needed.
J-Link tools (optional recovery only)
Only needed if the flasher app path fails or you want to recover a bricked
device. Provided by the
Step 1 Build the Main Firmware
Build before the flasher app, because the flasher embeds the MCUboot binary
from the main firmware build output.
cd 1wire_blesensro_prod
bash build.sh build
Each build is automatically stamped with a version derived from the git
commit count:
  Image version: 4.0.0+6
  ✓ Build done: build_debug/merged.hex  (version 4.0.0+6)
Key outputs:
| File | Used for |
build_debug/merged.hex | J-Link full flash (MCUboot + app combined) |
build_debug/1wire_blesensro_prod/zephyr/zephyr.signed.bin | USB DFU upload (app only, MCUboot-signed) |
build_debug/mcuboot/zephyr/zephyr.hex | Embedded in flasher app |
Step 2 Install MCUboot via the Flasher App (No J-Link)
A factory ItsyBitsy ships with the Adafruit UF2 bootloader. This step replaces it with MCUboot using a small Zephyr application that runs under the UF2 bootloader and rewrites flash pages 0–23 in-place.
How the flasher app works
The flasher is a standalone Zephyr application (flasher/) built without MCUboot (SB_CONFIG_BOOTLOADER_MCUBOOT=n). It lives at 0x26000 well above the UF2 bootloader region and is delivered to the device as a standard UF2 file. During the CMake build, gen_bin_array.py converts build_debug/mcuboot/zephyr/zephyr.hex into a C byte array (mcuboot_data.c) that is linked directly into the flasher binary. No external file transfer is needed the MCUboot binary is carried inside the flasher app itself.
When the flasher app runs it:
- Prints the bootloader size and target address range
- Counts down 5 seconds (power off to cancel)
- Writes MCUboot to flash pages 24 → 1 (in reverse order, so the vectortable at page 0 is written last)
- Locks interrupts before erasing page 0 to eliminate any erase/write race
- Writes page 0, issues a data/instruction barrier, then calls
NVIC_SystemReset()— bypassing Zephyr hooks that would hang with IRQslocked - Validates the new vector table (SP in RAM, reset vector in flash) beforeresetting; hangs in a fault loop if validation fails
2a. Build the flasher app
cd 1wire_blesensro_prod/flasher
bash build.sh
Output: flasher/build/flasher/zephyr/zephyr.hex
The build reads ../build_debug/mcuboot/zephyr/zephyr.hex and embeds it as a C array. Run Step 1 first so that file exists.
2b. Trigger UF2 mode on the ItsyBitsy
Double-tap the RST button rapidly. The red LED pulses and the USB mass storage volume ITSY840 appears on the host.
2c. Flash the flasher app
cd 1wire_blesensro_prod/flasher
bash flash.sh
The script:
- Checks that
build/flasher/zephyr/zephyr.hexexists - Converts it to UF2 using the bundled
hex_to_uf2.py(Nordic family ID0x5ADACE00) - Auto-detects the ITSY840 mount point by scanning for
INFO_UF2.TXTunder/media,/mnt, and removable devices - Copies the
.uf2file to the mount point - Waits for the device to eject (UF2 bootloader reboots the device afterwriting)
The UF2 bootloader writes the flasher app to flash at 0x26000 and boots it immediately.
2d. Watch the installation
The flasher app prints to the USB serial port. Open any terminal at 115200 baud to observe:
*** Booting nRF Connect SDK v2.8.0-a2386bfc8401 ***
*** Using Zephyr OS v3.7.99-0bc3393fb112 ***

================================================
   MCUboot Bootloader Installation Utility
   Version 1.1
================================================

Bootloader size: 80060 bytes (78 KB)
Installation range: 0x00000000 - 0x000138BB

After installation:
  - Device will reboot into MCUboot
  - Use DFU over BLE or USB to upload applications
  - Signed application images required

WARNING: Remove power within 5 seconds to cancel!
================================================

Starting in 5 seconds...
Starting in 4 seconds...
Starting in 3 seconds...
Starting in 2 seconds...
Starting in 1 second...

[Installation Progress]
Total pages to write: 20 (78 KB)

  [ 1/20] Writing page at 0x00013000... Done
  ...
  [19/20] Writing page at 0x00001000... Done
  [20/20] Writing page at 0x00000000... locking irq, then reset..
The device resets immediately after page 0 is written (might need pressing reset button) . MCUboot is now installed.
Step 3 Initial Firmware Upload (MCUboot Serial Recovery)
After the flasher runs, MCUboot is installed but slot0 contains no valid signed application. MCUboot enters serial recovery mode and waits indefinitely for DFU commands over USB CDC-ACM.
Device identification in recovery mode
MCUboot on the ItsyBitsy enumerates as:
| Field | Value |
| Manufacturer | Nordic Semiconductor |
| Product | nRF52840 Dongle |
| VID / PID | 0x1915 / 0x5200 |
| Baud | 115200 |
| Port (Linux) | /dev/ttyACM0 or by-id symlink |
The VID/PID pair is recognized by nRF Connect for Desktop as an SMP-capable device. Standard mcumgr also works directly.
Upload the initial signed binary
cd 1wire_blesensro_prod

PORT=$(ls /dev/serial/by-id/usb-Nordic_Semiconductor_nRF52840_Dongle_* 2>/dev/null \
       | head -1 | xargs readlink -f)
# Fallback if by-id not yet appeared:
PORT=${PORT:-/dev/ttyACM0}

mcumgr --conntype serial --connstring "dev=${PORT},baud=115200" \
    image upload \
    build_debug/1wire_blesensro_prod/zephyr/zephyr.signed.bin

mcumgr --conntype serial --connstring "dev=${PORT},baud=115200" reset
MCUboot writes the image directly to slot0, validates it, then boots into the application on reset.
Note on timing: MCUboot waits for DFU commands on every boot for
5 seconds (CONFIG_BOOT_SERIAL_WAIT_FOR_DFU_TIMEOUT=5000) before jumping
to a valid app. When no valid app exists, it waits indefinitely — there
is no rush for the initial upload.
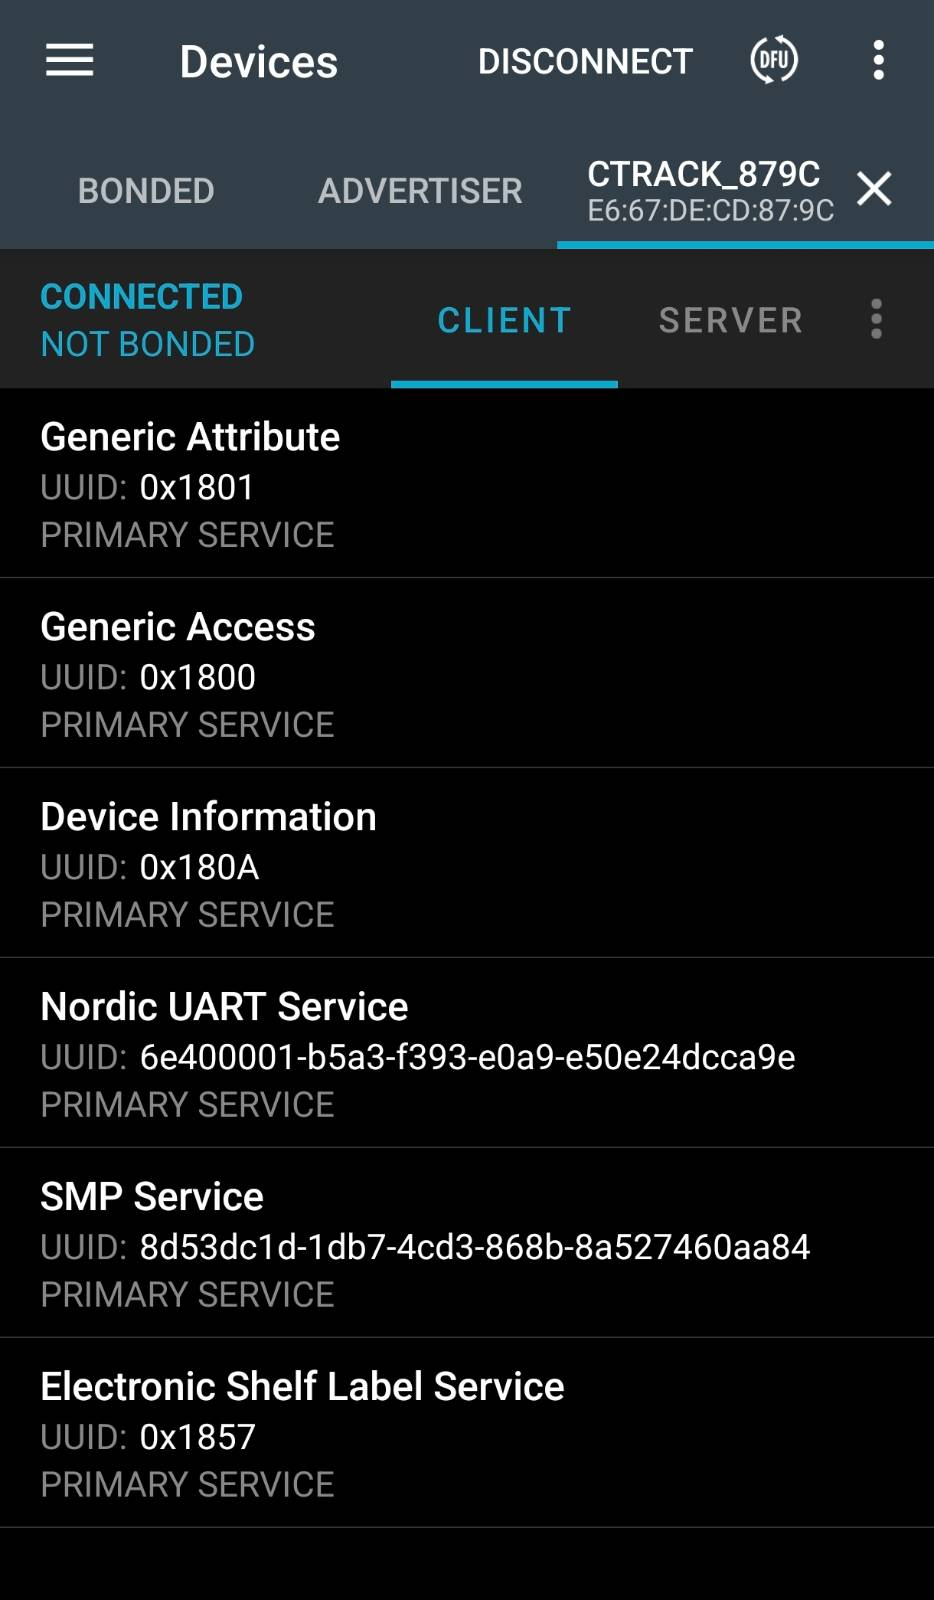
Step 4 First Boot: Automatic Device Identity
On the very first boot after a clean flash (empty NVS), the firmware generates a unique BLE device name derived from the last two bytes of the device's static random Bluetooth address:
CTrack_XXYY
For example, a device with address E6:67:DE:CD:87:9C names itself CTrack_879C. This happens automatically in config_manager_init():
bt_id_get(addrs, &count);
snprintf(unique, sizeof(unique), "CTrack_%02X%02X",
         addrs[0].a.val[1], addrs[0].a.val[0]);
settings_save_one("ble_sensor/name", unique, strlen(unique));
bt_set_name(unique);
The name is written to NVS (0xFC000) and survives all subsequent power cycles and firmware updates. It will not change unless explicitly overwritten via a NUS command or a factory reset.
The boot log confirms the generated name:
[00:00:03.165,832] <inf> config_manager: Initializing configuration manager
[00:00:03.166,076] <inf> config_manager: Loaded device name: CTrack_879C
[00:00:03.166,229] <inf> config_manager: Configuration loaded from storage
From this point the device advertises as CTrack_879C over BLE. Every sensor in a deployment has a distinct name tied to its hardware identity, with no manual configuration step required.
Advertised name vs. compile-time name:CONFIG_BT_DEVICE_NAMEis a
compile-time placeholder (CTrack22). Before everybt_le_adv_start(),
the advertising data is rebuilt from the runtime name that was set bybt_set_name(), so the advertised name always matches the NVS-stored
unique name — not the Kconfig default.
Step 5 Ongoing Firmware Updates (USB DFU)
After the initial firmware is running, all subsequent updates are delivered over USB while the device is running — no probe, no power cycle, no button press required.
Build
cd 1wire_blesensro_prod
bash build.sh build
Flash sensor tag only
cd tests
python3 flash_all.py --skip-ap --tag-port /dev/ttyACM2
Or using the build script directly:
bash build.sh flash_usb
The script performs four steps:
Plaintext
[1/4] Connecting...
       slot0: de8846cf...  v4.0.0+5  ['active', 'confirmed']
       slot1: <empty>

[2/4] Uploading firmware...
 328.53 KiB / 328.53 KiB [=====] 100.00% 429 KiB/s

[3/4] Checking slots...
       slot1: 40cdf368...  v4.0.0+6
       Mode: swap  (marking slot1 pending)

[4/4] Resetting...
       Waiting for device to reboot.............. ready

       slot0 running: 40cdf368...  v4.0.0+6  ['active', 'confirmed']

  OK  Firmware updated: v4.0.0+5 → v4.0.0+6
Flash AP + sensor tag together
Bash
cd tests
python3 flash_all.py
Uses flash_ap.py (nrfjprog / J-Link) for the Thingy:91x AP and test_01_uart_dfu.py (mcumgr serial) for the sensor tag in a single automated run.
What happens inside MCUboot during the swap
- New firmware is uploaded to slot1 while the application runs normally
- Slot1 is marked pending — MCUboot will try it on the next boot
- Device resets; MCUboot copies slot1 → slot0, keeping the old image inslot1 as a fallback
- New application boots and calls
boot_write_img_confirmed()— the swap is made permanent - If the new application never confirms (crashes or hangs), MCUbootautomatically reverts to the previous image on the next reset
This means a bad firmware update cannot permanently brick the device.
Step 6 Verifying a Running Device
Check firmware version and slot state
~/go/bin/mcumgr --conntype serial \
    --connstring "dev=/dev/ttyACM2,baud=115200" image list
Healthy output:
image=0 slot=0
    version: 4.0.0.6        ← running firmware
    flags: active confirmed  ← confirmed = permanent, survives reboot
    hash: 40cdf368...

image=0 slot=1
    version: 4.0.0.5        ← previous firmware, available for rollback
    flags:
    hash: de8846cf...
Manual rollback
CONN="dev=/dev/ttyACM2,baud=115200"
OLD_HASH=$(mcumgr --conntype serial --connstring "$CONN" image list \
    | awk '/slot=1/{found=1} found && /hash:/{print $2; exit}')
mcumgr --conntype serial --connstring "$CONN" image test "$OLD_HASH"
sleep 2
mcumgr --conntype serial --connstring "$CONN" reset
MCUboot swaps slot1 back to slot0. The reverted firmware must call boot_write_img_confirmed() to make it permanent, otherwise MCUboot reverts again after the next reset.
Firmware Versioning
Every build is automatically stamped using the git commit count:
BUILD_NUM=$(git rev-list --count HEAD)
IMG_VERSION="4.0.0+${BUILD_NUM}"
The version is embedded in the MCUboot image header via:
-DCONFIG_MCUBOOT_IMGTOOL_SIGN_VERSION="\"${IMG_VERSION}\""
This means mcumgr image list always shows a strictly increasing build number under version:, making it unambiguous whether a DFU update landed. The +N suffix is the increment field; the 4.0.0 prefix is changed manually for major releases.
Alternative: J-Link Initial Flash (Recovery Only)
If the flasher app path is unavailable the UF2 bootloader was previously removed, the double-tap RST trick does not trigger UF2 mode, or a partially failed flasher run left the device in an unknown state use J-Link to write the full merged.hex directly.
cd 1wire_blesensro_prod
bash build.sh build    # produces build_debug/merged.hex
bash build.sh flash    # J-Link: erase + write MCUboot + app in one shot
flash starts a JLinkRemoteServerCLExe tunnel on port 19020 (binds to the first detected J-Link serial number, avoiding multi-device selection dialogs), runs JLinkExe through it, and stops the server afterwards.
Device: 123456789 (tunnel on port 19020)
Flashing...
[JLink output: erasing + programming merged.hex]
✓ Flash + reset done
merged.hex contains both MCUboot and the signed application combined into one hex file. After J-Link programming, the device boots directly into the application no separate initial DFU step needed. From this point forward, all updates go over USB with flash_usb or flash_all.py. J-Link is not needed again unless recovery is required.
Clearing Stale BLE Bonds After a Chip Erase
A --chiperase (used by J-Link's full erase) wipes the NVS partition, erasing all BLE bonding keys from the device side. The Linux BlueZ stack retains its copies and will refuse to reconnect using the stale keys. Clear them before running BLE tests:
tests/bt_reset.sh                   # removes all CTrack* bonds automatically
# or for a specific address:
tests/bt_reset.sh E9:76:EE:E9:06:5F
You can also force the device to clear bonds over the NUS serial console:
UNPAIR      → UNPAIR_OK:BOND_CLEARED        (current connection only)
BT_CLEAR    → BT_CLEAR_OK:ALL_BONDS_REMOVED (all bonds)
Quick-Reference Flow
Factory ItsyBitsy (UF2 bootloader)
         │
         ▼  Step 1: bash build.sh build
  build firmware
  (produces merged.hex, zephyr.signed.bin, mcuboot/zephyr.hex)
         │
         ▼  Step 2a: cd flasher && bash build.sh
  build flasher app
  (embeds mcuboot/zephyr.hex as C array)
         │
         ▼  Step 2b: double-tap RST → ITSY840 drive appears
         │  Step 2c: bash flash.sh → copies flasher.uf2 to ITSY840
         │
         ▼  flasher app runs (5 s countdown)
  writes MCUboot to flash 0x0–0x18000
  NVIC_SystemReset()
         │
         ▼  MCUboot boots (no valid app → stays in serial recovery)
         │  Step 3: mcumgr image upload zephyr.signed.bin
         │          mcumgr reset
         │
         ▼  First boot (Step 4)
  generates CTrack_XXYY name → saves to NVS → advertises
         │
         ▼  Subsequent builds (Step 5)
  python3 tests/flash_all.py --skip-ap   # slot1 swap, J-Link not needed
./flash_all.py --skip-ap --tag-port /dev/ttyACM2

--------------------------------------------------
Flash All
--------------------------------------------------
  AP NET hex  : /home/mic/ncs/v2.8.0_clear/nrf/samples/bluetooth/nrf-esl-bluetooth/samples/central_esl/build_thingy91x/merged_CPUNET.hex
  AP APP hex  : /home/mic/ncs/v2.8.0_clear/nrf/samples/bluetooth/nrf-esl-bluetooth/samples/central_esl/build_thingy91x/merged.hex
  Tag binary  : /home/mic/ncs/v2.8.0_clear/nrf/samples/bluetooth/nrf-esl-bluetooth/1wire_blesensro_prod/build_debug/1wire_blesensro_prod/zephyr/zephyr.signed.bin
  Tag port    : /dev/ttyACM2
  AP flash    : skipped

[Step 1/2 skipped — AP]

--------------------------------------------------
Step 2/2 — Sensor Tag DFU
--------------------------------------------------

Sensor Tag DFU
  Binary : /home/mic/ncs/v2.8.0_clear/nrf/samples/bluetooth/nrf-esl-bluetooth/1wire_blesensro_prod/build_debug/1wire_blesensro_prod/zephyr/zephyr.signed.bin
  Port   : /dev/ttyACM2

[1/4] Connecting...
       slot0: <empty>  v?  []
       slot1: <empty>  v?

[2/4] Uploading firmware...

 0 / 336416 [------------------------------------------------------------------------]   0.00%
 292 B / 328.53 KiB [>---------------------------------------------]   0.09% 1.42 KiB/s 03m51s
 292 B / 328.53 KiB [>------------------------------------------------]   0.09% 726 B/s 03m51s
 292 B / 328.53 KiB [>------------------------------------------------]   0.09% 484 B/s 03m51s
 1.61 KiB / 328.53 KiB [>------------------------------------------]   0.49% 2.01 KiB/s 02m42s
 2.28 KiB / 328.53 KiB [>------------------------------------------]   0.69% 2.27 KiB/s 02m23s
 2.94 KiB / 328.53 KiB [>------------------------------------------]   0.90% 2.44 KiB/s 02m13s
  327.52 KiB / 328.53 KiB [================================================]  99.69% 1.10 KiB/s
 327.85 KiB / 328.53 KiB [================================================]  99.79% 1.10 KiB/s
 327.85 KiB / 328.53 KiB [================================================]  99.79% 1.10 KiB/s
 328.18 KiB / 328.53 KiB [================================================]  99.89% 1.10 KiB/s
 328.53 KiB / 328.53 KiB [==========================================] 100.00% 1.10 KiB/s 4m57s
Done

       329 KiB in 298s  (1.1 KiB/s)

[3/4] Checking slots...
       slot0: 40cdf36810dd5e16a1e83cc2e465964469383f950bed582be716fd4ce3088fd0  ['active', 'confirmed']
       slot1: <empty>  v?
       Mode: direct  (slot0 already updated, resetting)

[4/4] Resetting...
       Waiting for device to reboot............... ready

       slot0 running: 40cdf36810dd5e16a1e83cc2e465964469383f950bed582be716fd4ce3088fd0  v4.0.0.5  ['active', 'confirmed']

  OK  Firmware updated: v? → v4.0.0.5

==================================================
Summary
==================================================
  [OK  ]  Sensor tag DFU  (314s)

  1/1 steps OK